

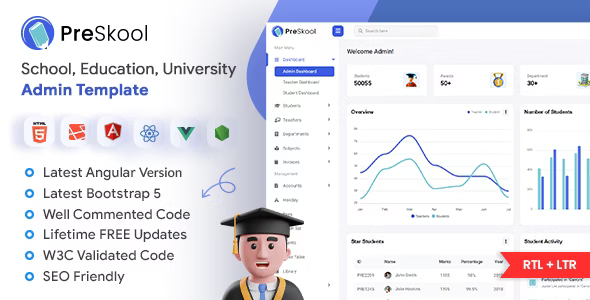
Technologies
- React 19.2
- TypeScript 5.9
- Vite 6.3 (build tool & dev server)
- Bootstrap 5.3 + SCSS
- React Router 7.9
- Redux Toolkit 2.12
System Requirements
- Node.js version >= 18 (LTS 20+ recommended)
- npm version >= 9 (ships with Node.js)
- Yarn package (Optional)
- Visual Studio Code
- Terminal
- A modern browser — Chrome, Edge, Firefox or Safari
– Built with React 19 and TypeScript on Vite 6
– 400+ ready-made pages grouped by module
– Role based dashboards — Admin, Teacher, Student and Parent
– Academic, HRM, Finance, Attendance, Library, Transport, Hostel, Communication
and Settings modules
– Hooks based architecture with reusable custom hooks
– Route level code splitting with React.lazy and
Suspense
– Central route registry — one named key per path
– Redux Toolkit store with theme settings persisted to localStorage
– Service layer that switches between mock data and a real REST API
– Light / Dark theme and four layout modes — default, mini, boxed and RTL
– Path aliases for clean imports
– Organised SCSS architecture
– Fully responsive design
– Cross browser compatible
– Clean and well commented code
– Easy to customize
– Developer friendly
– And many more...
Project Overview
The project follows a modular structure with clear separation of
concerns. Page UI lives in views/, template internals in
core/, and data access in services/.
preskool/
│
└── react/
    │
    ├── public/
    │   ├── assets/                 # images, fonts and static files
    │   └── favicon.png
    │
    ├── src/
    │   ├── app/
    │   │   └── providers/          # AppProviders, AuthProvider, auth-context
    │   │
    │   ├── components/
    │   │   ├── routing/            # ProtectedRoute, RoleGuard
    │   │   ├── ui/                 # shared presentational components
    │   │   └── workspace/
    │   │
    │   ├── config/                 # env.ts — the only reader of import.meta.env
    │   ├── constants/
    │   │
    │   ├── core/
    │   │   ├── common/             # header, sidebar, modals, theme-settings
    │   │   ├── data/               # redux store, slices and menu JSON
    │   │   └── modals/
    │   │
    │   ├── features/               # feature hooks — auth, dashboard, students
    │   ├── hooks/                  # useForm, useQuery, useToasts, …
    │   ├── layouts/                # MainLayout.tsx, AuthLayout.tsx
    │   ├── mocks/                  # static fixtures returned by mock services
    │   │
    │   ├── routes/
    │   │   ├── all_routes.tsx      # every path as a named key
    │   │   ├── route_config.tsx    # lazy imports + route arrays
    │   │   └── index.tsx           # the <Routes> tree
    │   │
    │   ├── services/               # api/, auth/, dashboard/, students/
    │   ├── style/
    │   │   ├── css/
    │   │   ├── fonts/
    │   │   ├── icon/
    │   │   └── scss/
    │   ├── types/
    │   ├── utils/
    │   ├── views/                  # every page's UI, grouped by module
    │   │
    │   ├── environment.tsx         # base_path and img_path
    │   ├── index.scss
    │   └── main.tsx                # application entry point
    │
    ├── eslint.config.js
    ├── index.html
    ├── package.json
    ├── package-lock.json
    ├── tsconfig.json
    ├── tsconfig.app.json
    ├── tsconfig.node.json
    └── vite.config.ts
Structure Overview
PreSkool React is built with React 19, TypeScript and Vite.
main.tsx mounts the app, AppProviders supplies the
Redux store and the auth session, and ALLRoutes renders every
page inside one of the two layouts.
The structure follows a clear top-down flow:
- Entry point —
src/main.tsximports global CSS and mounts the app insideBrowserRouter - Providers —
src/app/providers/AppProviders.tsxcomposes the Redux store and the auth context - Layouts —
MainLayoutwraps the app pages (header, sidebar, theme settings),AuthLayoutwraps the bare login and error screens - Views —
src/views/holds every page's UI, grouped by module (academic, hrm, finance-accounts, peoples …) - Services —
src/services/is the only place that talks to data, so views stay presentational
Entry Point — src/main.tsx:
import React from "react";
import { createRoot } from "react-dom/client";
import { BrowserRouter } from "react-router";

import { base_path } from "./environment";
import AppProviders from "./app/providers/AppProviders";
import ALLRoutes from "./routes";

import "../node_modules/bootstrap/dist/css/bootstrap.min.css";
import "../src/style/css/feather.css";
import "../src/index.scss";
import "bootstrap";

createRoot(document.getElementById("root")!).render(
  <React.StrictMode>
    {/* AppProviders composes the Redux store and the auth session provider. */}
    <AppProviders>
      <BrowserRouter basename={base_path}>
        <ALLRoutes />
      </BrowserRouter>
    </AppProviders>
  </React.StrictMode>
);
Route Tree — src/routes/index.tsx:
import React, { Suspense } from "react";
import { Route, Routes } from "react-router";

import { authRoutes, publicRoutes } from "./route_config";
import MainLayout from "../layouts/MainLayout";
import AuthLayout from "../layouts/AuthLayout";
import ProtectedRoute from "@components/routing/ProtectedRoute";

const Login = React.lazy(() => import("../views/auth/login/login"));

const ALLRoutes: React.FC = () => (
  <Suspense fallback={<div>Loading...</div>}>
    <Routes>
      <Route path="/" element={<Login />} />

      {/* ProtectedRoute is a pass-through while VITE_AUTH_ENABLED is false. */}
      <Route element={<ProtectedRoute />}>
        <Route element={<MainLayout />}>
          {publicRoutes.map((route, idx) => (
            <Route path={route.path} element={route.element} key={idx} />
          ))}
        </Route>
      </Route>

      <Route element={<AuthLayout />}>
        {authRoutes.map((route, idx) => (
          <Route path={route.path} element={route.element} key={idx} />
        ))}
      </Route>
    </Routes>
  </Suspense>
);

export default ALLRoutes;
Sample View — src/views/…/index.tsx:
import { Link } from "react-router-dom";
import { all_routes } from "@/routes/all_routes";
import { useQuery } from "@hooks";
import { studentsService } from "@services/students";

const StudentList = () => {
  const routes = all_routes;
  const { data: students, loading, error } = useQuery(() => studentsService.list());

  if (loading) return <div className="p-4">Loading...</div>;
  if (error) return <div className="p-4 text-danger">{error.message}</div>;

  return (
    <div className="page-wrapper">
      <div className="content">
        <h4 className="mb-3">Students</h4>
        <div className="row">
          {students?.map((student) => (
            <div className="col-xxl-3 col-xl-4 col-md-6" key={student.id}>
              <div className="card">
                <div className="card-body">
                  <h6>
                    <Link to={routes.studentDetails}>{student.name}</Link>
                  </h6>
                  <p className="mb-0">{student.email}</p>
                </div>
              </div>
            </div>
          ))}
        </div>
      </div>
    </div>
  );
};

export default StudentList;
Note
Images are rendered through
<ImageWithBasePath>
(src/core/common/imageWithBasePath). It prefixes
img_path from src/environment.tsx so assets resolve
correctly under the Vite base.
Scripts Overview
The PreSkool React template uses Vite as the build tool. These are the only four scripts you need for development, linting and production builds.
You can find the scripts in the package.json file.
Here are the available commands:
| Command | Description |
|---|---|
npm run dev |
Starts the Vite development server with hot module
replacement on
http://localhost:5173/react |
npm run build |
Type-checks the project with tsc -b, then
bundles it for production into dist/ |
npm run preview |
Serves the last production build locally so you can verify it before deploying |
npm run lint |
Runs ESLint across the project using the flat config in
eslint.config.js |
Package.json Scripts Section:
"scripts": {
  "dev": "vite",
  "build": "tsc -b && vite build",
  "lint": "eslint .",
  "preview": "vite preview"
}After unzipping the template files, you will find our product Preskool -> react (Source code)Node.js (18 or above) and npm are required to run the React projectOpen a terminal in the react folder and install the
dependencies:
npm install (or) npm install --legacy-peer-depsTo run the project in development mode, run the command:
npm run devThe application starts on
http://localhost:5173/react. The /react prefix
comes from the base option in vite.config.ts
— change it there if you deploy to a different path.
If you want to make a build in production mode, run the following command in the root directory, otherwise the project will continue to run in the development mode.
npm run buildThe build output is written to the dist/ folder. To check
that build locally before deploying, run:
npm run previewTo install any plugins in your application, you have to run the following command
npm install plugin_name --save (or) npm install plugin_name --legacy-peer-depsDeployment Note
Serve the contents of dist/ from any static
host. Because routing happens on the client, the host must rewrite
unknown paths back to index.html — otherwise refreshing a
deep link returns a 404.
Two Files, Kept In Sync
Aliases are declared twice — in
compilerOptions.paths of tsconfig.app.json (for
TypeScript) and in resolve.alias of
vite.config.ts (for the bundler). If you add one, add it to
both files.
| Alias | Target |
|---|---|
@/* | src/* |
@app/* | src/app/* |
@views/* | src/views/* |
@components/* | src/components/* |
@core/* | src/core/* |
@layouts/* | src/layouts/* |
@features/* | src/features/* |
@mocks/* | src/mocks/* |
@hooks, @hooks/* | src/hooks/* |
@services, @services/* | src/services/* |
@config, @config/* | src/config/* |
@constants, @constants/* | src/constants/* |
@utils, @utils/* | src/utils/* |
@routes, @routes/* | src/routes/* |
Usage:
import { all_routes } from "@/routes/all_routes";
import ProtectedRoute from "@components/routing/ProtectedRoute";
import { useBootstrapTooltips } from "@hooks/useBootstrapTooltips";
import { studentsService } from "@services/students";
Routing uses React Router and is driven by two
files inside src/routes/:
all_routes.tsx— every path as a named key. This is the single source of truth; always link withroutes.studentList, never a raw string.route_config.tsx— the lazy imports plus two arrays:publicRoutes(rendered insideMainLayout) andauthRoutes(rendered insideAuthLayout).
Adding a New Page
| Step | What to do |
|---|---|
| 1 | Create the view under src/views/<module>/my-page/index.tsx |
| 2 | Add the path to src/routes/all_routes.tsx |
| 3 | Add a React.lazy import and a
publicRoutes entry in
src/routes/route_config.tsx |
| 4 | Link to it with routes.myPage |
1. Register the path — all_routes.tsx:
export const all_routes = {
  // …existing paths
  myPage: "/my-page",
};
2. Register the route — route_config.tsx:
const MyPage = React.lazy(() => import("@views/module/my-page"));

export const publicRoutes = [
  // …existing routes
  {
    path: routes.myPage,
    element: <MyPage />,
    route: Route,
  },
];
3. Link to it:
import { Link } from "react-router-dom";
import { all_routes } from "@/routes/all_routes";

<Link to={all_routes.myPage}>My Page</Link>Runs Without a Backend
The template ships with mock data enabled and authentication
disabled, so it runs correctly with no .env file and no
server.
Each domain folder in src/services/ follows the same
four-file shape:
| File | Responsibility |
|---|---|
<domain>.types.ts |
TypeScript types shared by both implementations |
<domain>.mock.ts |
Resolves data from the fixtures in src/mocks/ |
<domain>.http.ts |
Real REST calls through the shared client |
<domain>.service.ts |
Picks mock or HTTP via createService |
createService
(src/services/api/create-service.ts) chooses the implementation from
env.useMockApi, so call sites never change. All HTTP traffic goes
through the single client in src/services/api/client.ts.
Connecting a Real Backend
Create a .env file in the react folder:
VITE_API_BASE_URL=https://api.example.com/v1
VITE_USE_MOCK_API=false
VITE_AUTH_ENABLED=true| Variable | Default | Description |
|---|---|---|
VITE_APP_ENV |
development |
Environment label — development, staging or production |
VITE_API_BASE_URL |
empty | Base URL of the REST API |
VITE_USE_MOCK_API |
true |
Resolve data from static mocks instead of HTTP |
VITE_AUTH_ENABLED |
false |
Enforce authentication on protected routes |
src/config/env.ts is the only module that reads
import.meta.env. While VITE_AUTH_ENABLED is
false, ProtectedRoute and RoleGuard render
their children unconditionally, so every route stays reachable. Flip it to
true once a real auth API is connected and the same components start
enforcing the session.
Important Note : Every VITE_* value is inlined into
the client bundle and is therefore public. Never put a secret or a private
key in one.
Theme state lives in Redux
(src/core/data/redux/themeSettingSlice.tsx) and is persisted to
localStorage. MainLayout mirrors that state onto the
<html> element as data attributes, and the SCSS keys off
them.
| Attribute | Values |
|---|---|
data-theme |
light, dark |
data-layout |
default, mini, boxed,
rtl |
data-sidebar |
light, dark, primary,
darkblack, darkblue |
data-sidebarbg |
default, sidebarbg1 …
sidebarbg6 |
data-color |
primary, violet, pink,
orange, green, red |
data-topbar |
white, dark, primary,
grey |
All of these are switched at runtime from the gear panel in the
header, which is implemented in
src/core/common/theme-settings. Because the values are written to
localStorage, the choice survives a page reload.
Open the Theme Settings panel from the gear icon in the
header and choose Dark under Mode. The selection is stored
in localStorage, so it is remembered on the next visit.
To make dark mode the default for every new visitor instead,
change the initial value in
src/core/data/redux/themeSettingSlice.tsx:
const initialState = {
  // …
  dataTheme: localStorage.getItem("dataTheme") || "dark_data_theme",
  // …
};
MainLayout maps
dark_data_theme to data-theme="dark" on the
<html> element, which is what the SCSS reads.
Open the Theme Settings panel and pick the
RTL layout. MainLayout then sets
data-layout="rtl" on the <html> element and
the template stylesheet flips the layout direction.
If you want the Bootstrap grid and utilities themselves mirrored
as well, swap the Bootstrap stylesheet import in
src/main.tsx for the RTL build:
// Replace this line
import "../node_modules/bootstrap/dist/css/bootstrap.min.css";

// with this one
import "../node_modules/bootstrap/dist/css/bootstrap.rtl.min.css";
RTL-specific overrides used by the template live under the
.layout-mode-rtl selector in src/index.scss.
The logo files live in public/assets/img/. The simplest
route is to replace those files with your own, keeping the same names and
roughly the same dimensions.
| File | Where it is used |
|---|---|
assets/img/logo.svg |
Full logo, expanded sidebar in light mode |
assets/img/logo-small.svg |
Compact logo, mini sidebar layout |
assets/img/logo-dark.svg |
Full logo, dark mode |
To point at differently named files instead, edit
src/core/common/header/index.tsx:
<Link to={routes.adminDashboard} className="logo logo-normal">
  <ImageWithBasePath src="assets/img/logo.svg" alt="Logo" />
</Link>
<Link to={routes.adminDashboard} className="logo-small">
  <ImageWithBasePath src="assets/img/logo-small.svg" alt="Logo" />
</Link>
<Link to={routes.adminDashboard} className="dark-logo">
  <ImageWithBasePath src="assets/img/logo-dark.svg" alt="Logo" />
</Link>
The browser tab icon is public/favicon.png, referenced
from index.html in the project root.
The template uses Inter. Changing it takes two edits.
1. Swap the import in
src/style/scss/components/_font.scss:
@import url('https://fonts.googleapis.com/css2?family=Inter:wght@400;500;600;700&display=swap');2. Update the family stack in
src/style/scss/utils/_variables.scss:
// Font Family
$font-family-primary: "Inter", -apple-system, BlinkMacSystemFont, "Segoe UI", Roboto, Helvetica, Arial, sans-serif;
The base size and weight scale are declared in the same file
($font-size-base, $font-weight-medium and friends),
so you can adjust typography globally from one place.
Six preset accent colors ship with the template and can be switched at runtime from the Theme Settings panel — primary, violet, pink, orange, green and red.
To change the brand color itself, edit the theme variables in
src/style/scss/utils/_variables.scss:
// Theme Colors Variables
$primary: #3D5EE1;
$secondary: #6FCCD8;
$success: #1ABE17;
$info: #0F65CD;
$warning: #EAB300;
$danger: #E82646;
$dark: #202C4B;
$light: #E9EDF4;
Hover shades are derived from these with
color.adjust, so changing $primary updates
$primary-hover automatically. Vite recompiles the SCSS as soon as
you save.
Need Support?
If this documentation does not address your questions, please feel free to contact us via email at support@dreamstechnologies.com
Reach the team at GMT+5:30. Typical reply within 12–24 hours on weekdays — rarely up to 48 hrs during holidays. Support is available to verified buyers for template-related issues.
Contact SupportImportant Note : We strive to offer top-notch support, but it's only available to verified buyers and for template-related issues such as bugs and errors. Custom changes and third-party module setups are not covered.
Do you need a customized application for your business?
If you need a customized application for your business depends on your specific requirements and goals, Please contact us. Customization can be the key to success, ensuring your project perfectly aligns with your unique goals and requirements.
Don't Miss Out on the Benefits of Customization!
Unlock the potential of your project. It's time to ensure your project isn't another cookie-cutter solution but truly unique and effective one.
Discover how customization can make a difference in your project's success. Let's create a solution that's as unique as your vision!
We'll tailor the application to meet your specific needs and preferences.
We will upload your website to the server and ensure it is live.

Thank You
Thank you once again for downloading Preskool.
We hope you're enjoying your experience, and we kindly request that you take a
moment to share your valuable review and rating with us.